Shopware, Magento, JTL and Co. – how to install homie AI in 5 minutes
9 March 2026
Integration in Minutes
New tools often mean: hiring developers, aligning timelines, planning deployments, fixing bugs. What should actually take an hour turns into a two-week construction site. That costs time. That costs money. And during this time, your shop continues to sell without the assistant that should have been working for you ages ago.
At homie AI, we thought differently from the start. Two paths. One result: homie AI is live.
🎉
Just one more step
Click on the link in the email we just sent you.
Path 1 – The Code Snippet
Directly into the shop system, ready in 3 steps. This path works with any shop system that gives you access to the theme code – WooCommerce, Shopware, Magento, JTL, and many more.
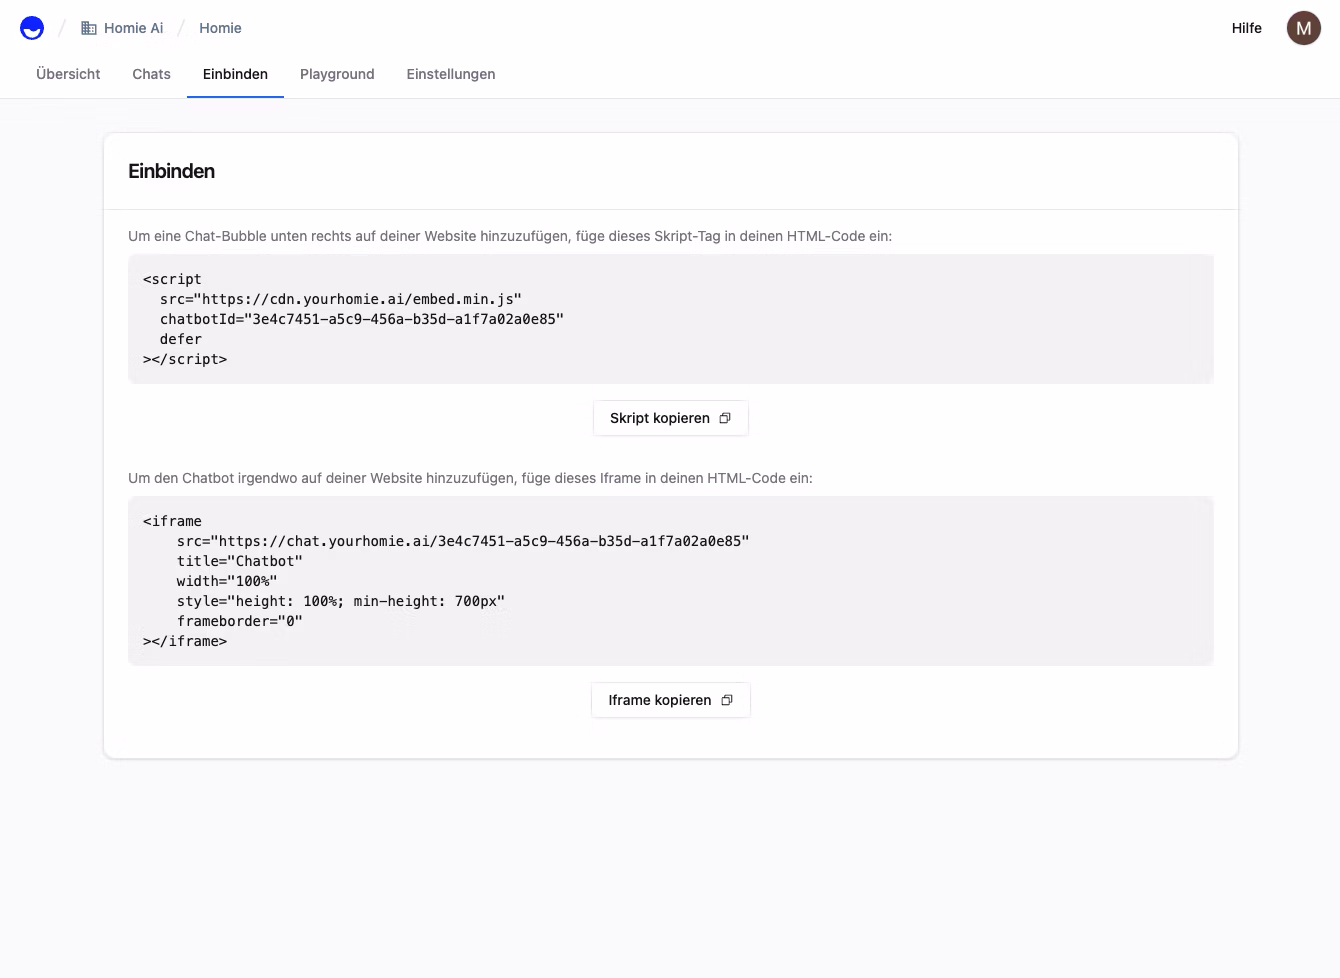
Step 1 – Get your personal script. Click on "Copy Script" under Connect in the homie AI dashboard. That's it on our end – the script already contains your individual chatbot ID and is ready to go.
The code snippet is easily copied from the homie AI interface
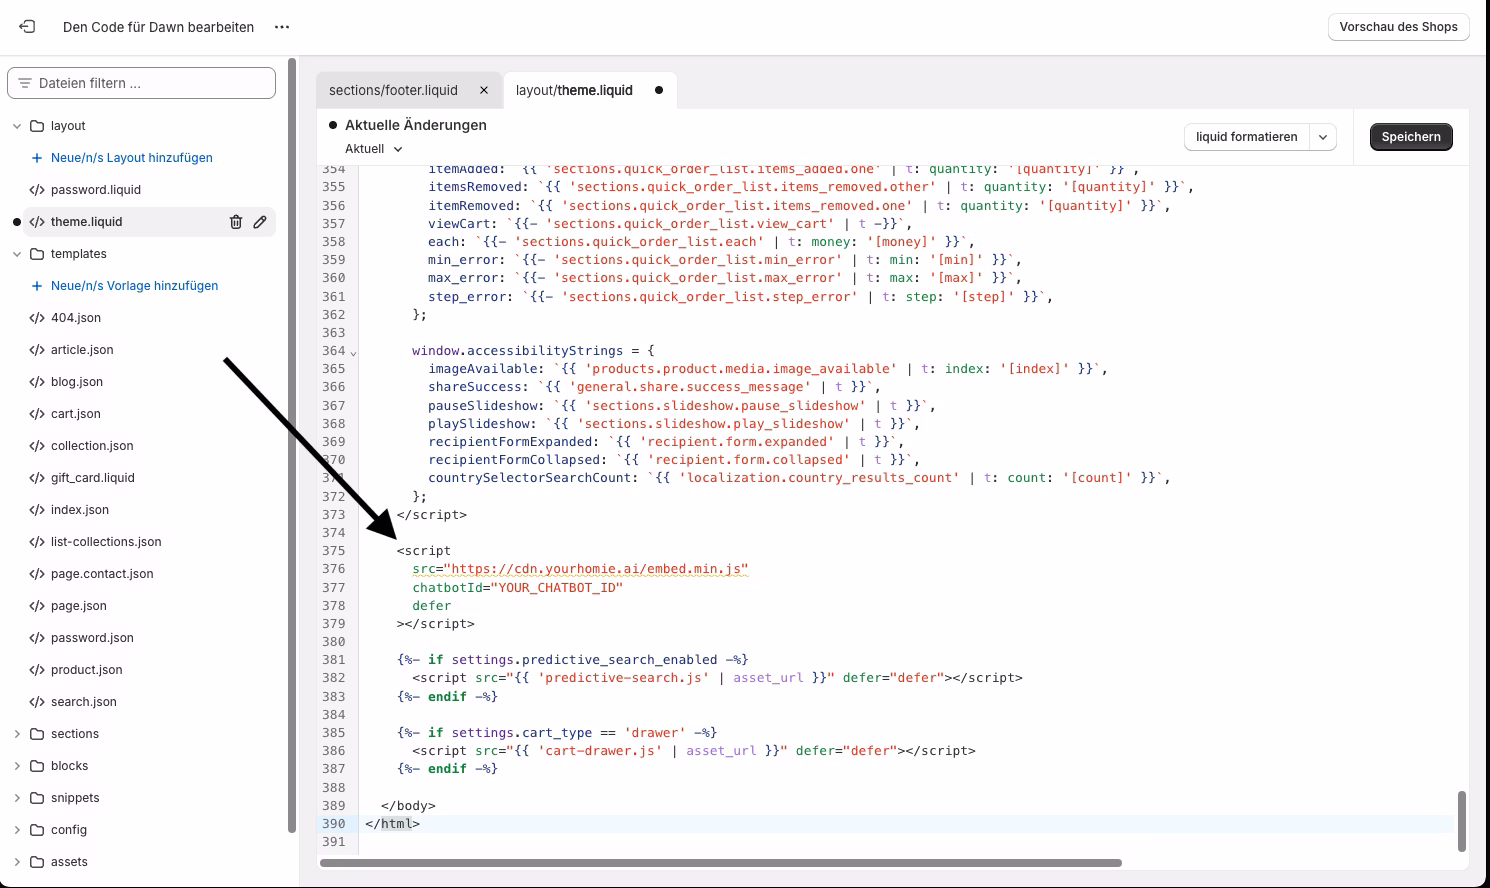
Step 2 – Navigate to the theme code in the shop system. Open the code editor of your active theme. Depending on the system, this might be called "Edit Theme", "Code Editor", or "Template Manager" – you are looking for the central layout file that is loaded on every page. Typically, this is a file like theme.liquid, base.html, or layout.tpl.
Step 3 – Insert script & save. Scroll down to the bottom of this file – just before the closing
tag. Insert the script. Save. Refresh the shop. The homie chat bubble appears in the bottom right corner. From now on, homie AI is selling for you. Program code in a window. The snippet is placed directly above the in your theme. The script is under 5 KB, loads entirely asynchronously, and has no impact on your loading time or PageSpeed scores.The code snippet is inserted into the theme
Path 2 – Google Tag Manager
No code, no theme access needed. Are you already using Google Tag Manager – or do you not want to delve into the theme code at all? Then this path is even more convenient. Particularly useful if you want to roll out homie AI on multiple domains or properties simultaneously.
Step 1 – Copy the script from the homie dashboard. Identical to above: Dashboard → Connect → "Copy Script".
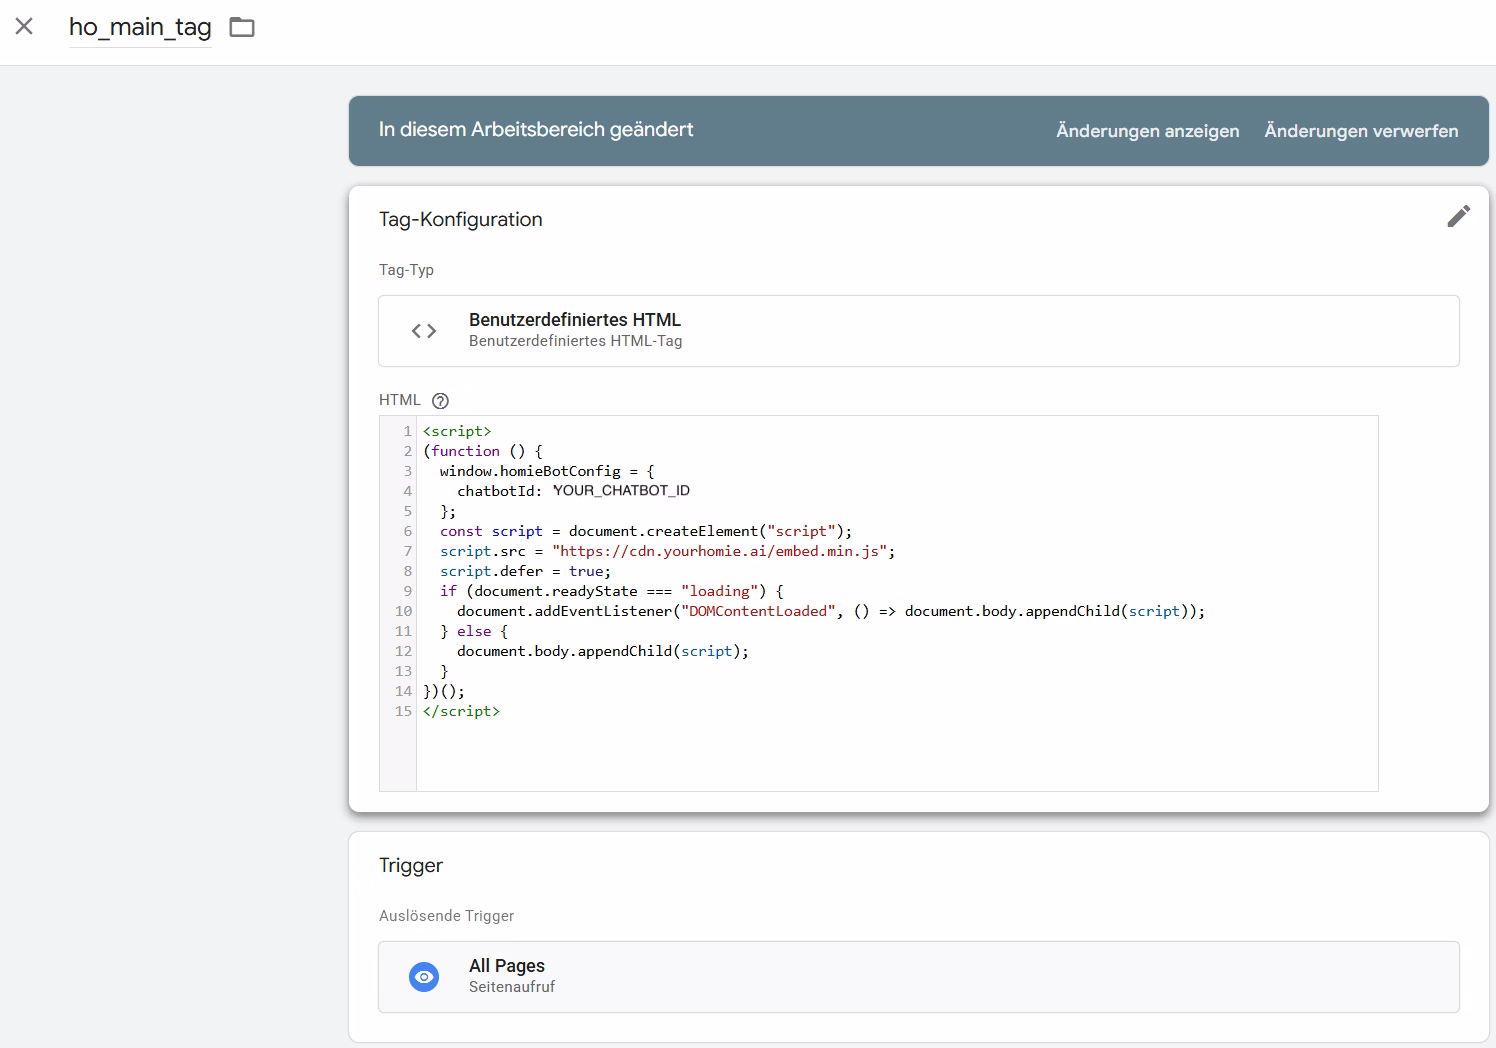
Step 2 – Create a new tag in GTM. Open the correct container at tagmanager.google.com, click "Add New Tag", and select Custom HTML as the tag type. Paste in the copied script – your chatbot ID is already included.
Step 3 – Set trigger & publish. Select "All Pages" as the trigger so that the chat bubble appears cross-page. Then click Submit → Publish. GTM immediately deploys the tag. Refresh the store – and homie AI is live. On all properties simultaneously.
The trigger is set up easily
What Happens After the Integration
Both paths lead to the same result: an AI sales assistant who knows your entire product catalog, answers customer questions in real time, and actively guides visitors through the purchasing process – automated, personalised, around the clock.
+30% higher conversion in accompanied sessions
Drastically reduced support efforts through automated responses to recurring questions
More revenue from existing traffic – without additional ads budget
Shopify Users?
Even easier. For everyone using Shopify: homie AI is directly available in the Shopify App Store. Install the app, activate it – done. Not even touching code. Ready to get started? No matter which shop system you use.